Not Your Best Loaf, But Your First Loaf
I distinctly remember the first time I made bread. I don’t know how I got it into my head that this was a good idea, but I was determined to try it. I scoured the internet for recipes, and I had a remarkably difficult time finding one that didn’t require a KitchenAid or a thermometer. I was 23, living in a tiny Studio in downtown Seattle, working at a magazine with two jobs on the side—I wasn’t about to buy a $300 mixer. I found what felt like a billion different recipes, and a litany of terms and techniques with which I was wholly unfamiliar. Autolyse. Poolish. Batard. Bulk fermentation. There was Allrecipes, the Food Network, Betty Crocker—tons of possibly, and probably, crappy recipes, and if I chose the wrong one, I’d waste five hours of my life making something that I would immediately throw away. It’s just four ingredients, and I make a damn good cake, what could possibly be so hard about this? I wondered.
But the thing is, it is hard. Or if not hard, at least it’s a learned skill. And like anything that’s worth learning, it involves endurance. I spent ten years testing, screwing up, cursing at my oven, and lying on the kitchen floor in agony over loaves that never rose, but at this point, I can say with confidence that I am actually pretty good at making bread. I finally got myself a KitchenAid and a thermometer about three years in; they work wonders. These things don’t happen overnight—I needed to fail and learn and obsess to get over the hump, and eventually, get really good.
And that brings me to you. You’re here to make your first loaf, and you need it to not be an epic failure, so that you will try again, and again after that. You need one simple formula, no special equipment (although, listen, just get a scale), so you can make something that’s edible. And hey, it’ll be way more than edible—it’ll have a deep, crackly crust, a soft, springy interior, and a pleasant, salty flavor. You’ll be proud to show it off, but more importantly, you’ll step back and go, “cool, I made bread.” It won’t be your best loaf—that’s ten years down the road. It’s just your first loaf. And you gotta start somewhere.
Clear your Saturday.
No matter which way you slice it (!), good country bread takes all day to make. In fact, it usually takes multiple days, but in the interest of gently onboarding you to bread-land, this is a simple one-day procedure. If you start around 9AM, you’ll have bread ready by dinner time. The key is this: Be patient. Be gentle. The more you smash and pound this dough, the stodgier your bread will be—there are a couple steps where you can beat it up a little more, but, especially as you get closer to baking, you want to preserve air bubbles and treat those loaves like the sweet little babies they are. The dough does best when it’s warm and cozy, so turn the heat on, or keep your oven running on low to warm up your kitchen. Then, be patient. Bread-making is the perfect excuse to spend all day reading Chaucer, or keeping up with the Kardashians. Savor it.
Time: 1 day
Active Time: ~2 hrs
Makes: Two medium, dome-shaped loaves (boules)
EQUIPMENT
1. Mix flour and water; let rest
Add flour and water to a large bowl. Get your hands damp with warm water, and mix until well-combined; no dry spots. It’ll be rugged, ugly, and messy—be sure to remove any rings first.
Cover with plastic wrap or a damp kitchen towel and let rest for about 30 minutes.
2. Add yeast and salt; let rest
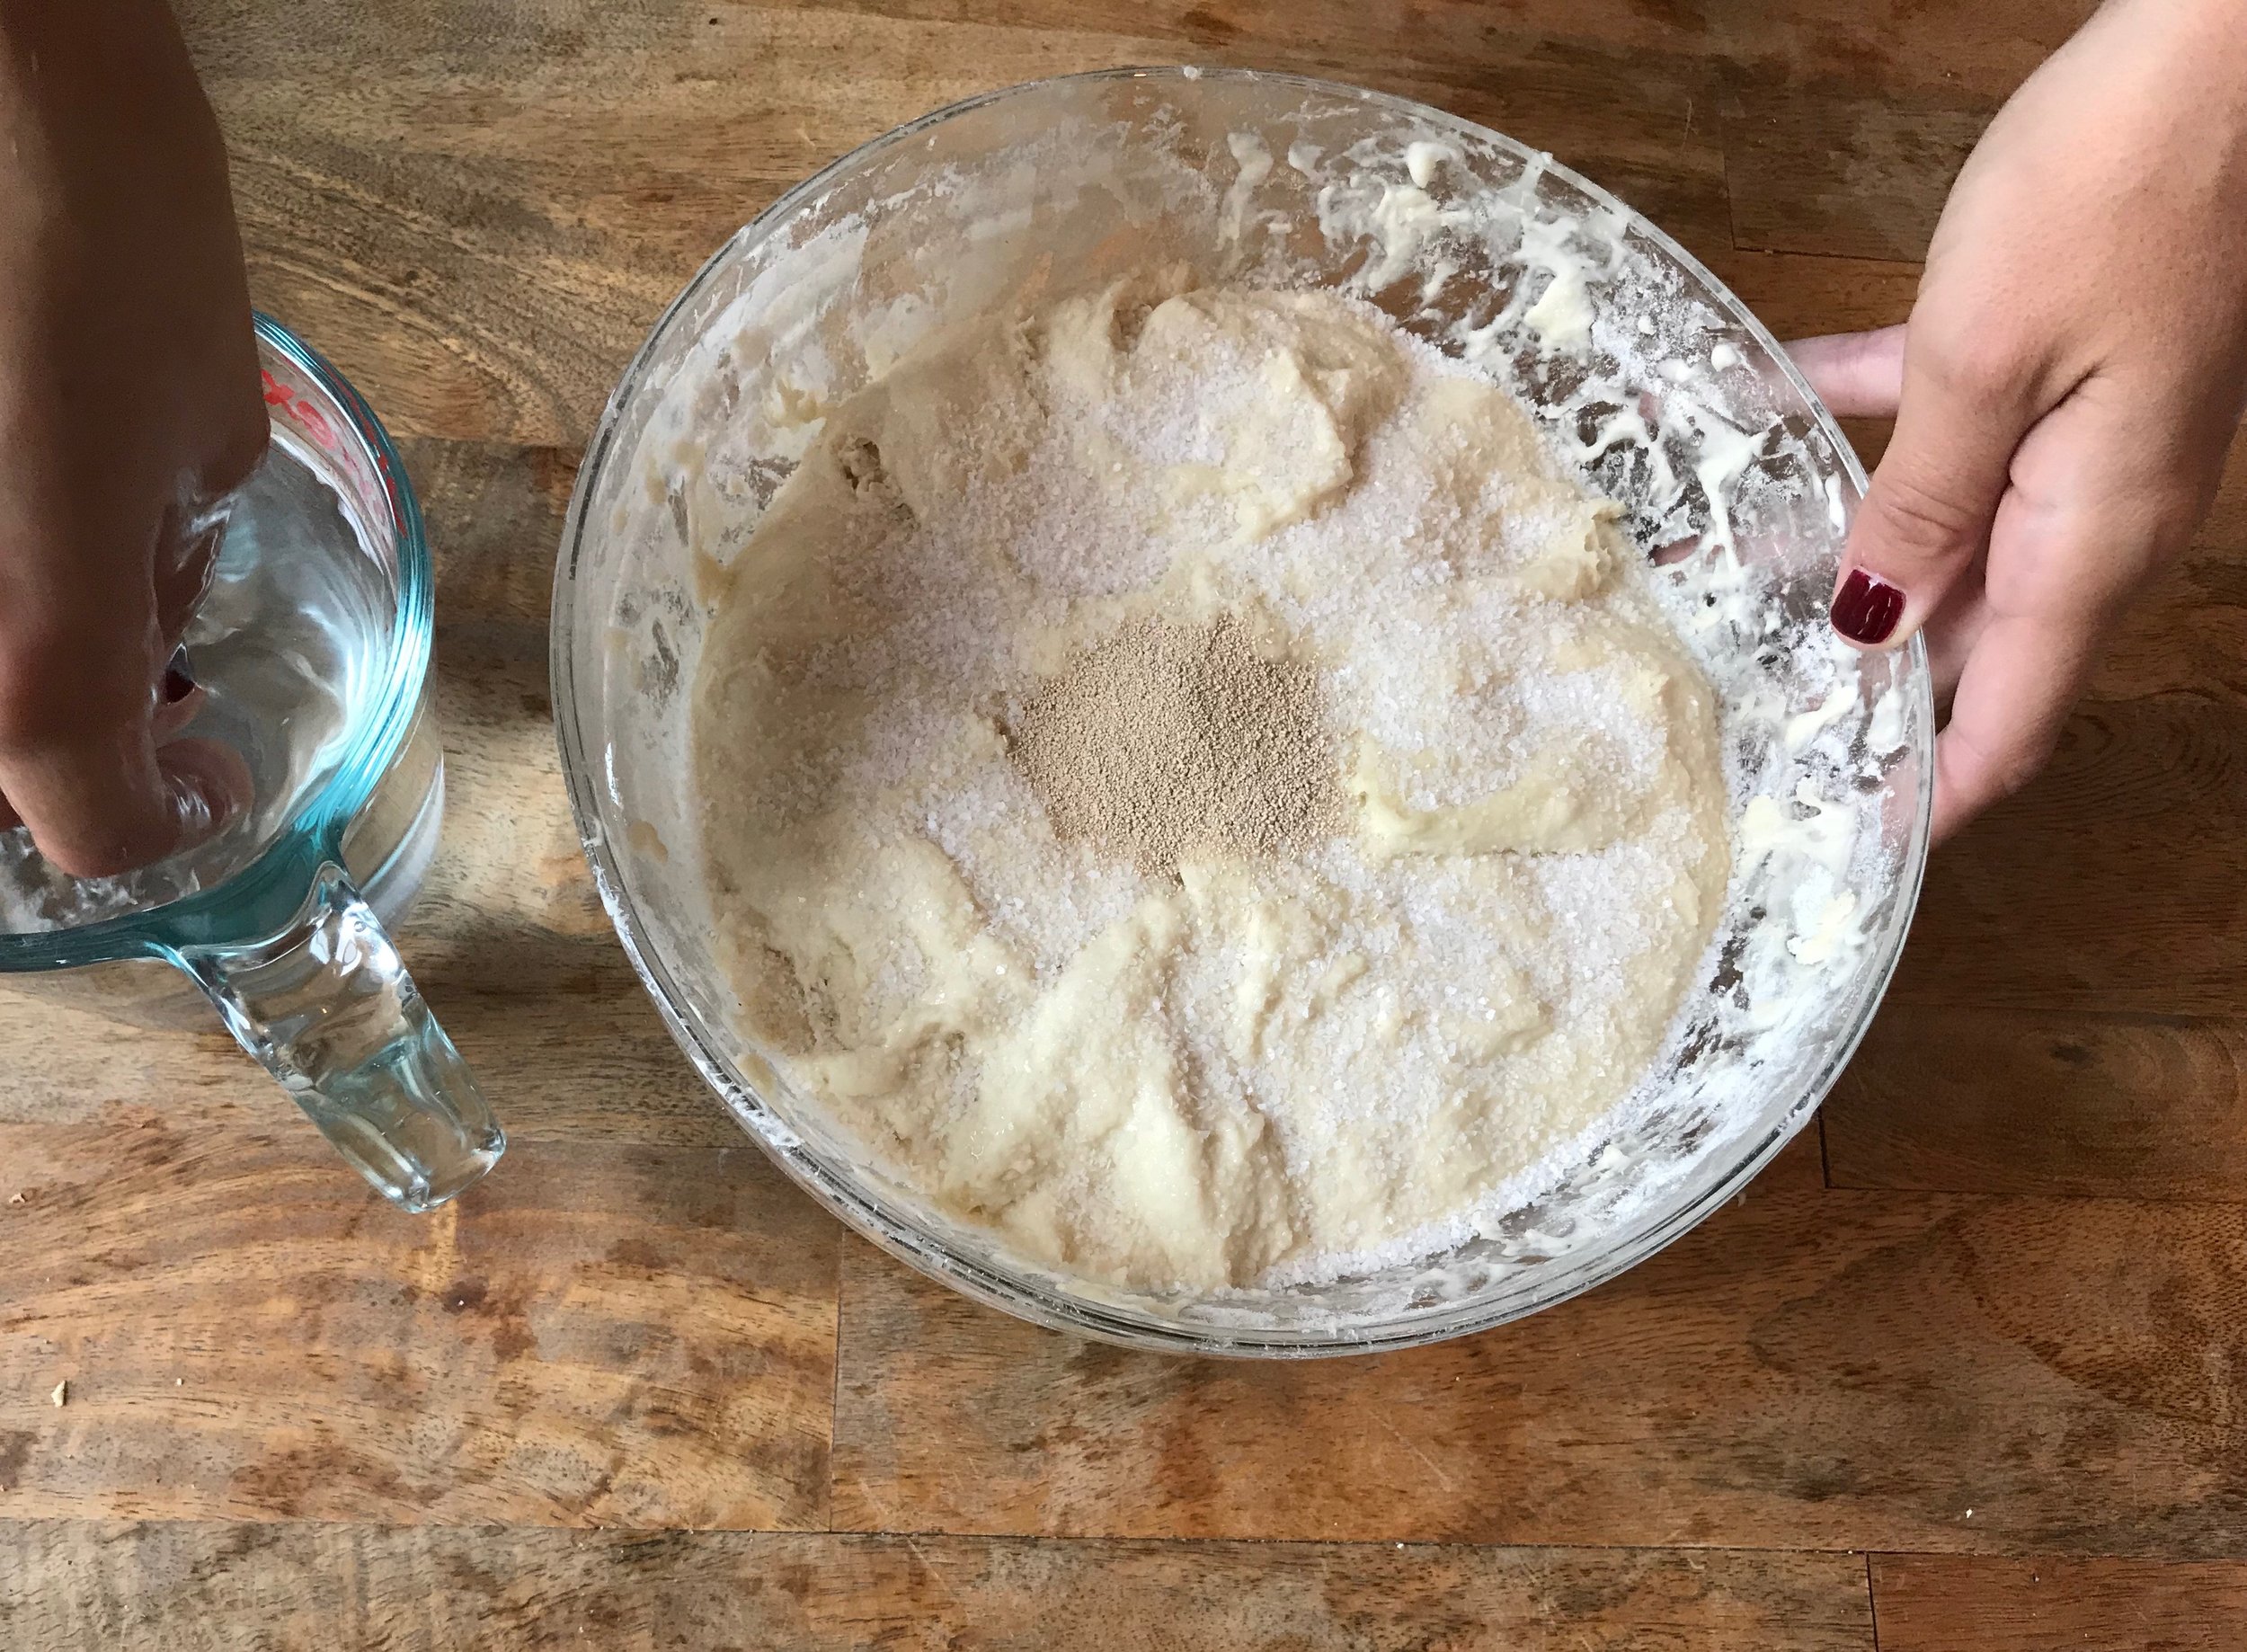
Sprinkle the yeast and salt over the top, and use your hands to incorporate. It’s okay to really beat it up on this step—smoosh and stretch inside the bowl to get all that salt and yeast worked in. Wet your hands as you go to unstick the sticky.
Cover with plastic wrap or a damp kitchen towel and rest for 15–20 minutes.
3. For the next four hours, stretch & fold three times
Use your hands to pick up one side of the dough, stretch it, and fold it over the top of the rest of the dough, pushing down with your fingertips as you fold. Repeat the motion for five to ten minutes, then cover with plastic wrap and let rest for at least 30 minutes. Here’s a good 30-second video by some random person.
Repeat three times over the next four hours. After the final fold, let the dough rest and rise for an hour. It should double to triple in size.
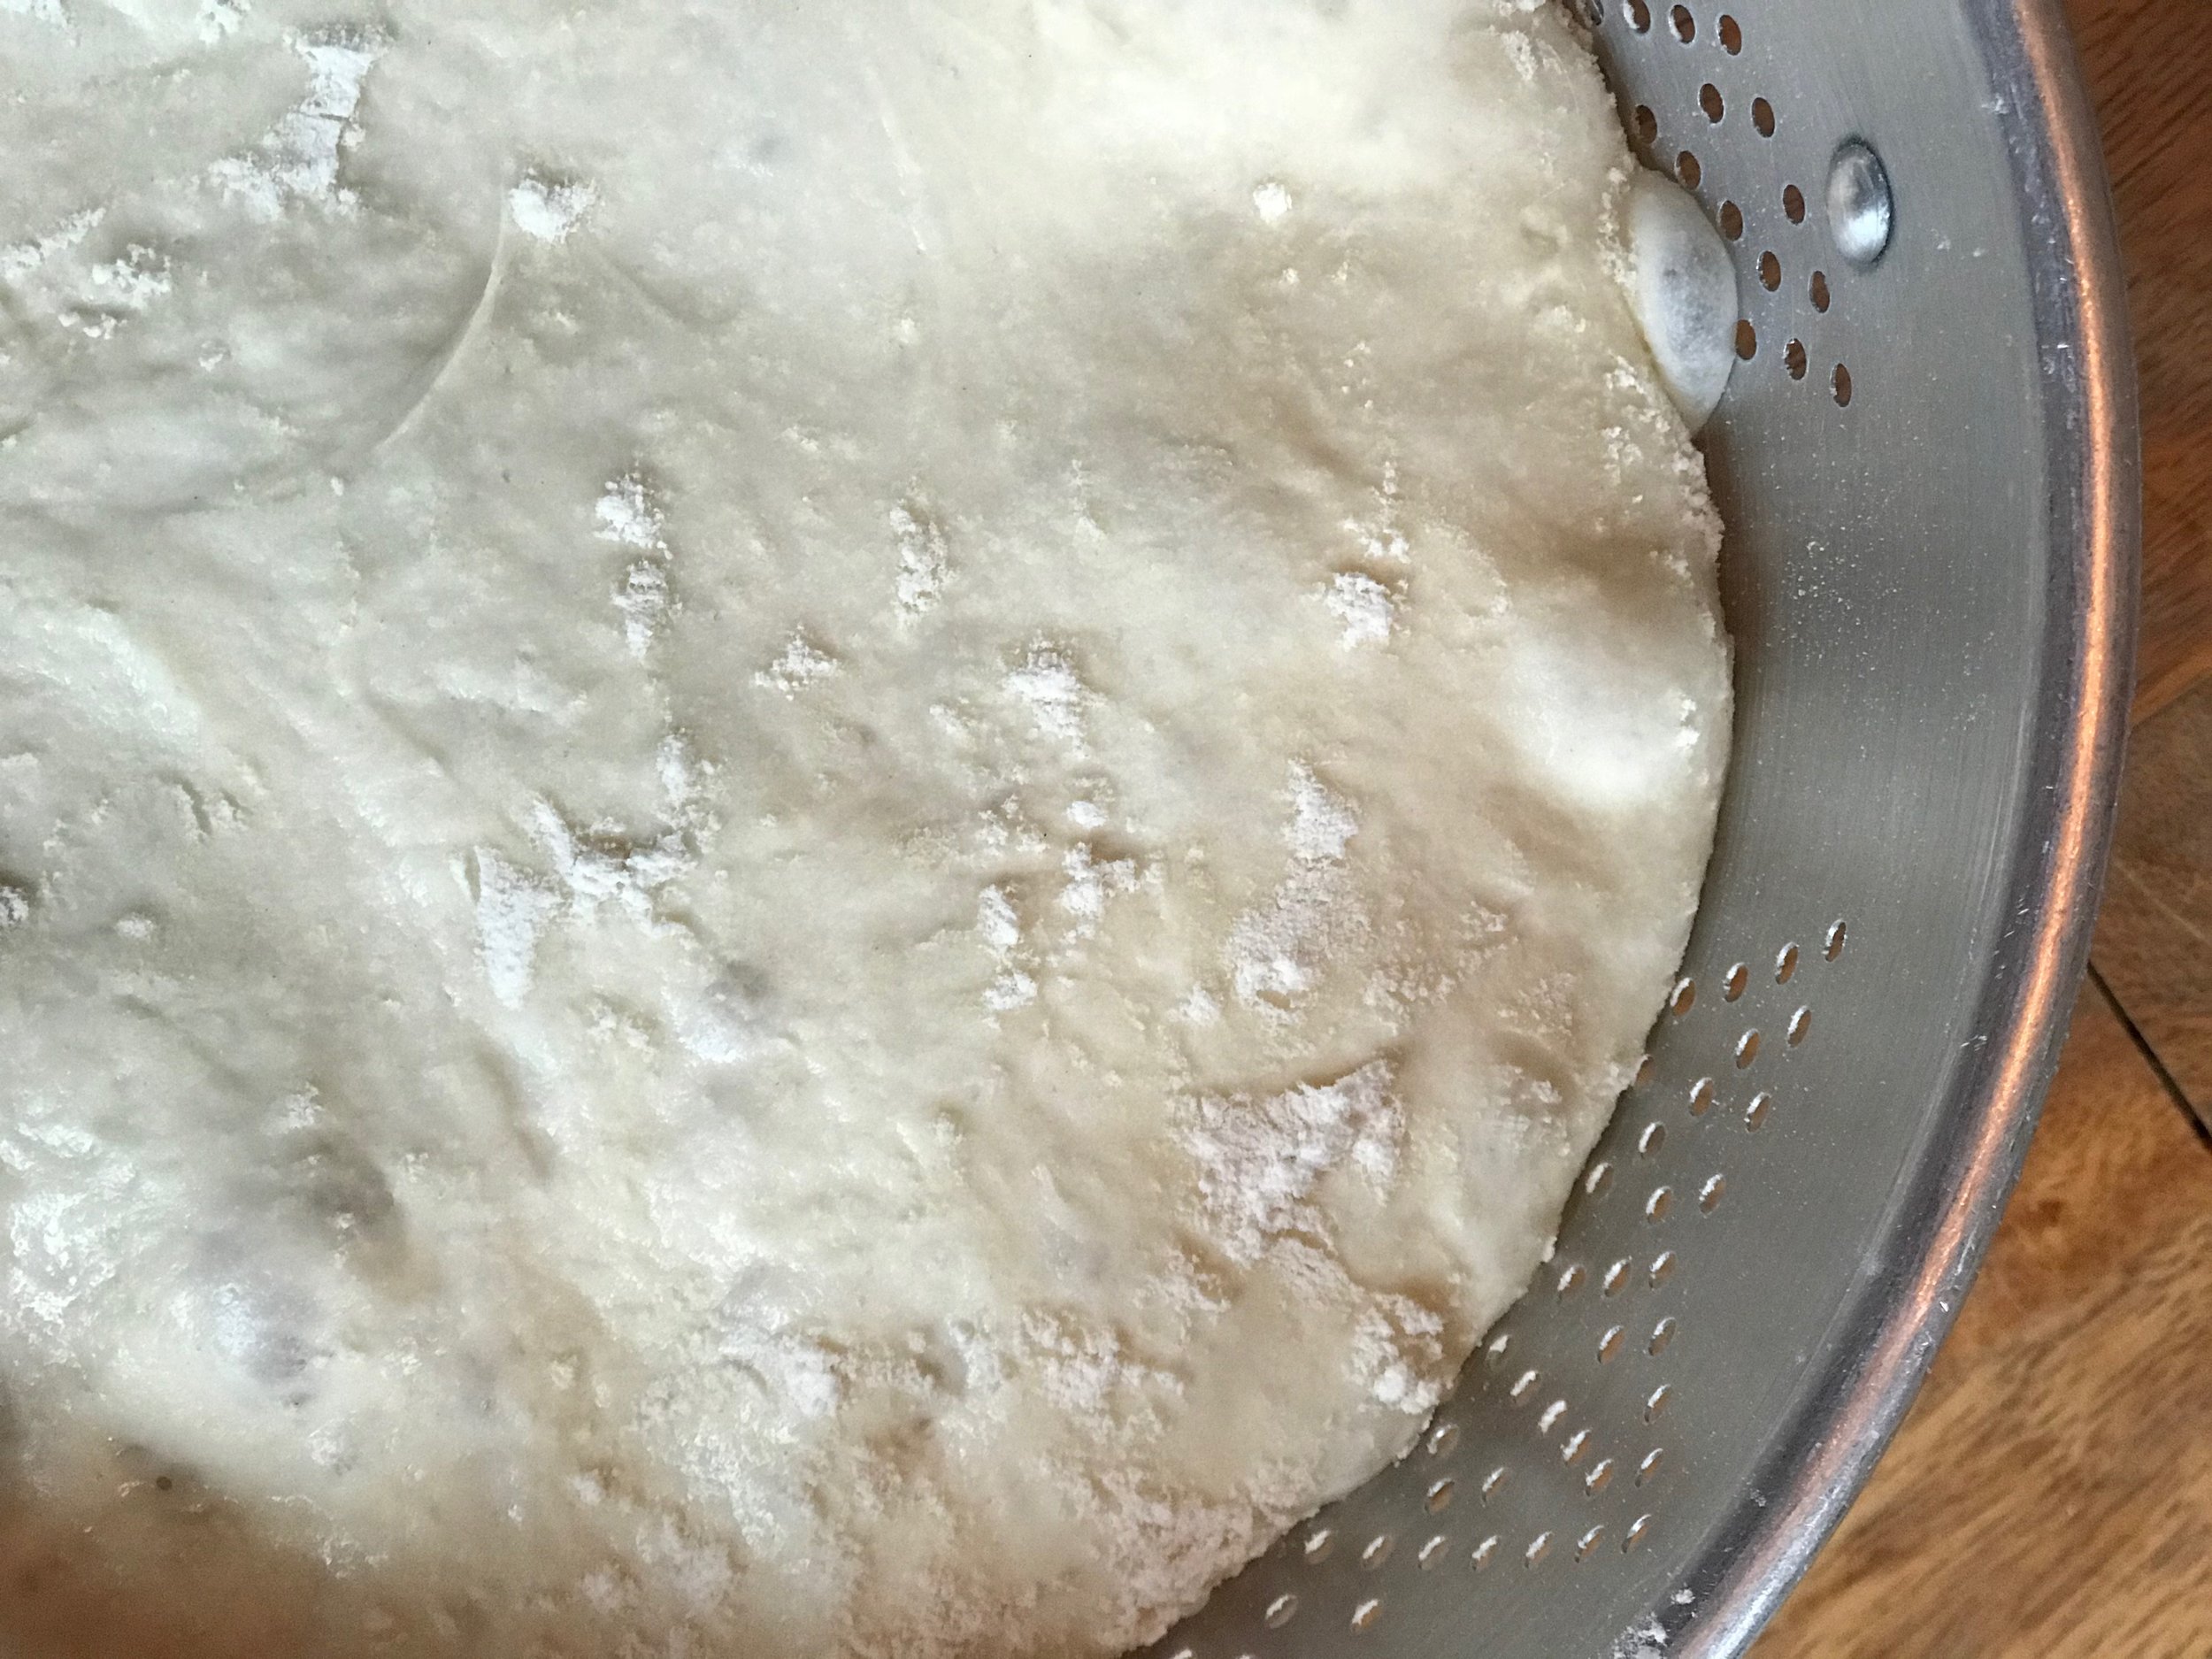
By the last fold, your dough should look smoother and more cohesive, like the picture below.
4. Prep some resting bowls
Very lightly grease two clean colanders or bowls, and dust flour all over them. The idea is just to keep the dough from sticking.
5. Divide
Lightly flour a large work surface, and dust your hands with flour. Tip your dough gently onto the work surface, without stretching or tearing it too much. At this point you should treat the dough like it’s delicate, preserving air bubbles when possible.
Gently shape into a ball. In one quick motion (ie without too much sawing), cut the dough into two equal portions using a bench scraper or a big knife.
6. Shape
Place one portion of the dough in the middle of your lightly-floured work surface, and set the second one aside, covered loosely with plastic wrap.
Working gently with your hands, fold the edges of the circle into the middle, pressing down with your fingertips. This will be the seam-side of your loaf—from here on out, you want to keep one side smooth and domed, and the seam-side can be crappy-looking.
Flip the dough over so it’s seam-side down, and use the edges of your palms to rotate and tighten the loaf. Here’s a quick video from that same random person.
The dough will be very soft and flowy—try to preserve those air bubbles, and only use your fingertips on the seam-side of the boule.
Cover the finished boule with plastic wrap, and set it aside while you repeat with the second boule. When you’re done, place each loaf seam-side up in the prepared colander or bowl.
7. Rest for an hour
Put both bowls into a trash bag on your counter. Let rest for an hour.
After an hour, they will double in size, and look all soft and bubbly, like this:
8. Heat oven to 500°F; place empty Dutch oven in the oven. Let heat for 1 hour.
Turn your oven as hot as it gets, or at least 500°F. Put the empty Dutch oven in there and let it heat up for at least an hour. You want that thing super hot—it’ll act like a mini bread oven.
9. Cover one loaf with plastic wrap; let rest in the fridge
It’ll stay there until after the other one is done baking.
10. Put the other loaf into the hot Dutch oven
Warning: That Dutch oven is going to be blazing hot, so be extra careful from here on out.
Remove the hot Dutch oven from the oven. Dust a little flour in the bottom.
On a lightly floured surface nearby, tip the colander or bowl over and let the dough slide out. If it sticks, don’t stress, just gently peel it away with your hands. If you lose the pretty loaf shape, gently shape it back, trying to preserve air bubbles.
Place the loaf seam-side down in the floured Dutch oven. At this point, you can use a sharp knife to cut a couple quick slits in the surface—this will give the bread some crusty edges on the top. Keep your cuts super swift—no sawing—and only right at the surface. (If this stresses you out, you can skip this step.)
Put the lid on, and put the whole thing in the oven.
11. Bake with lid 30 minutes; remove lid and bake for another 5–15 minutes
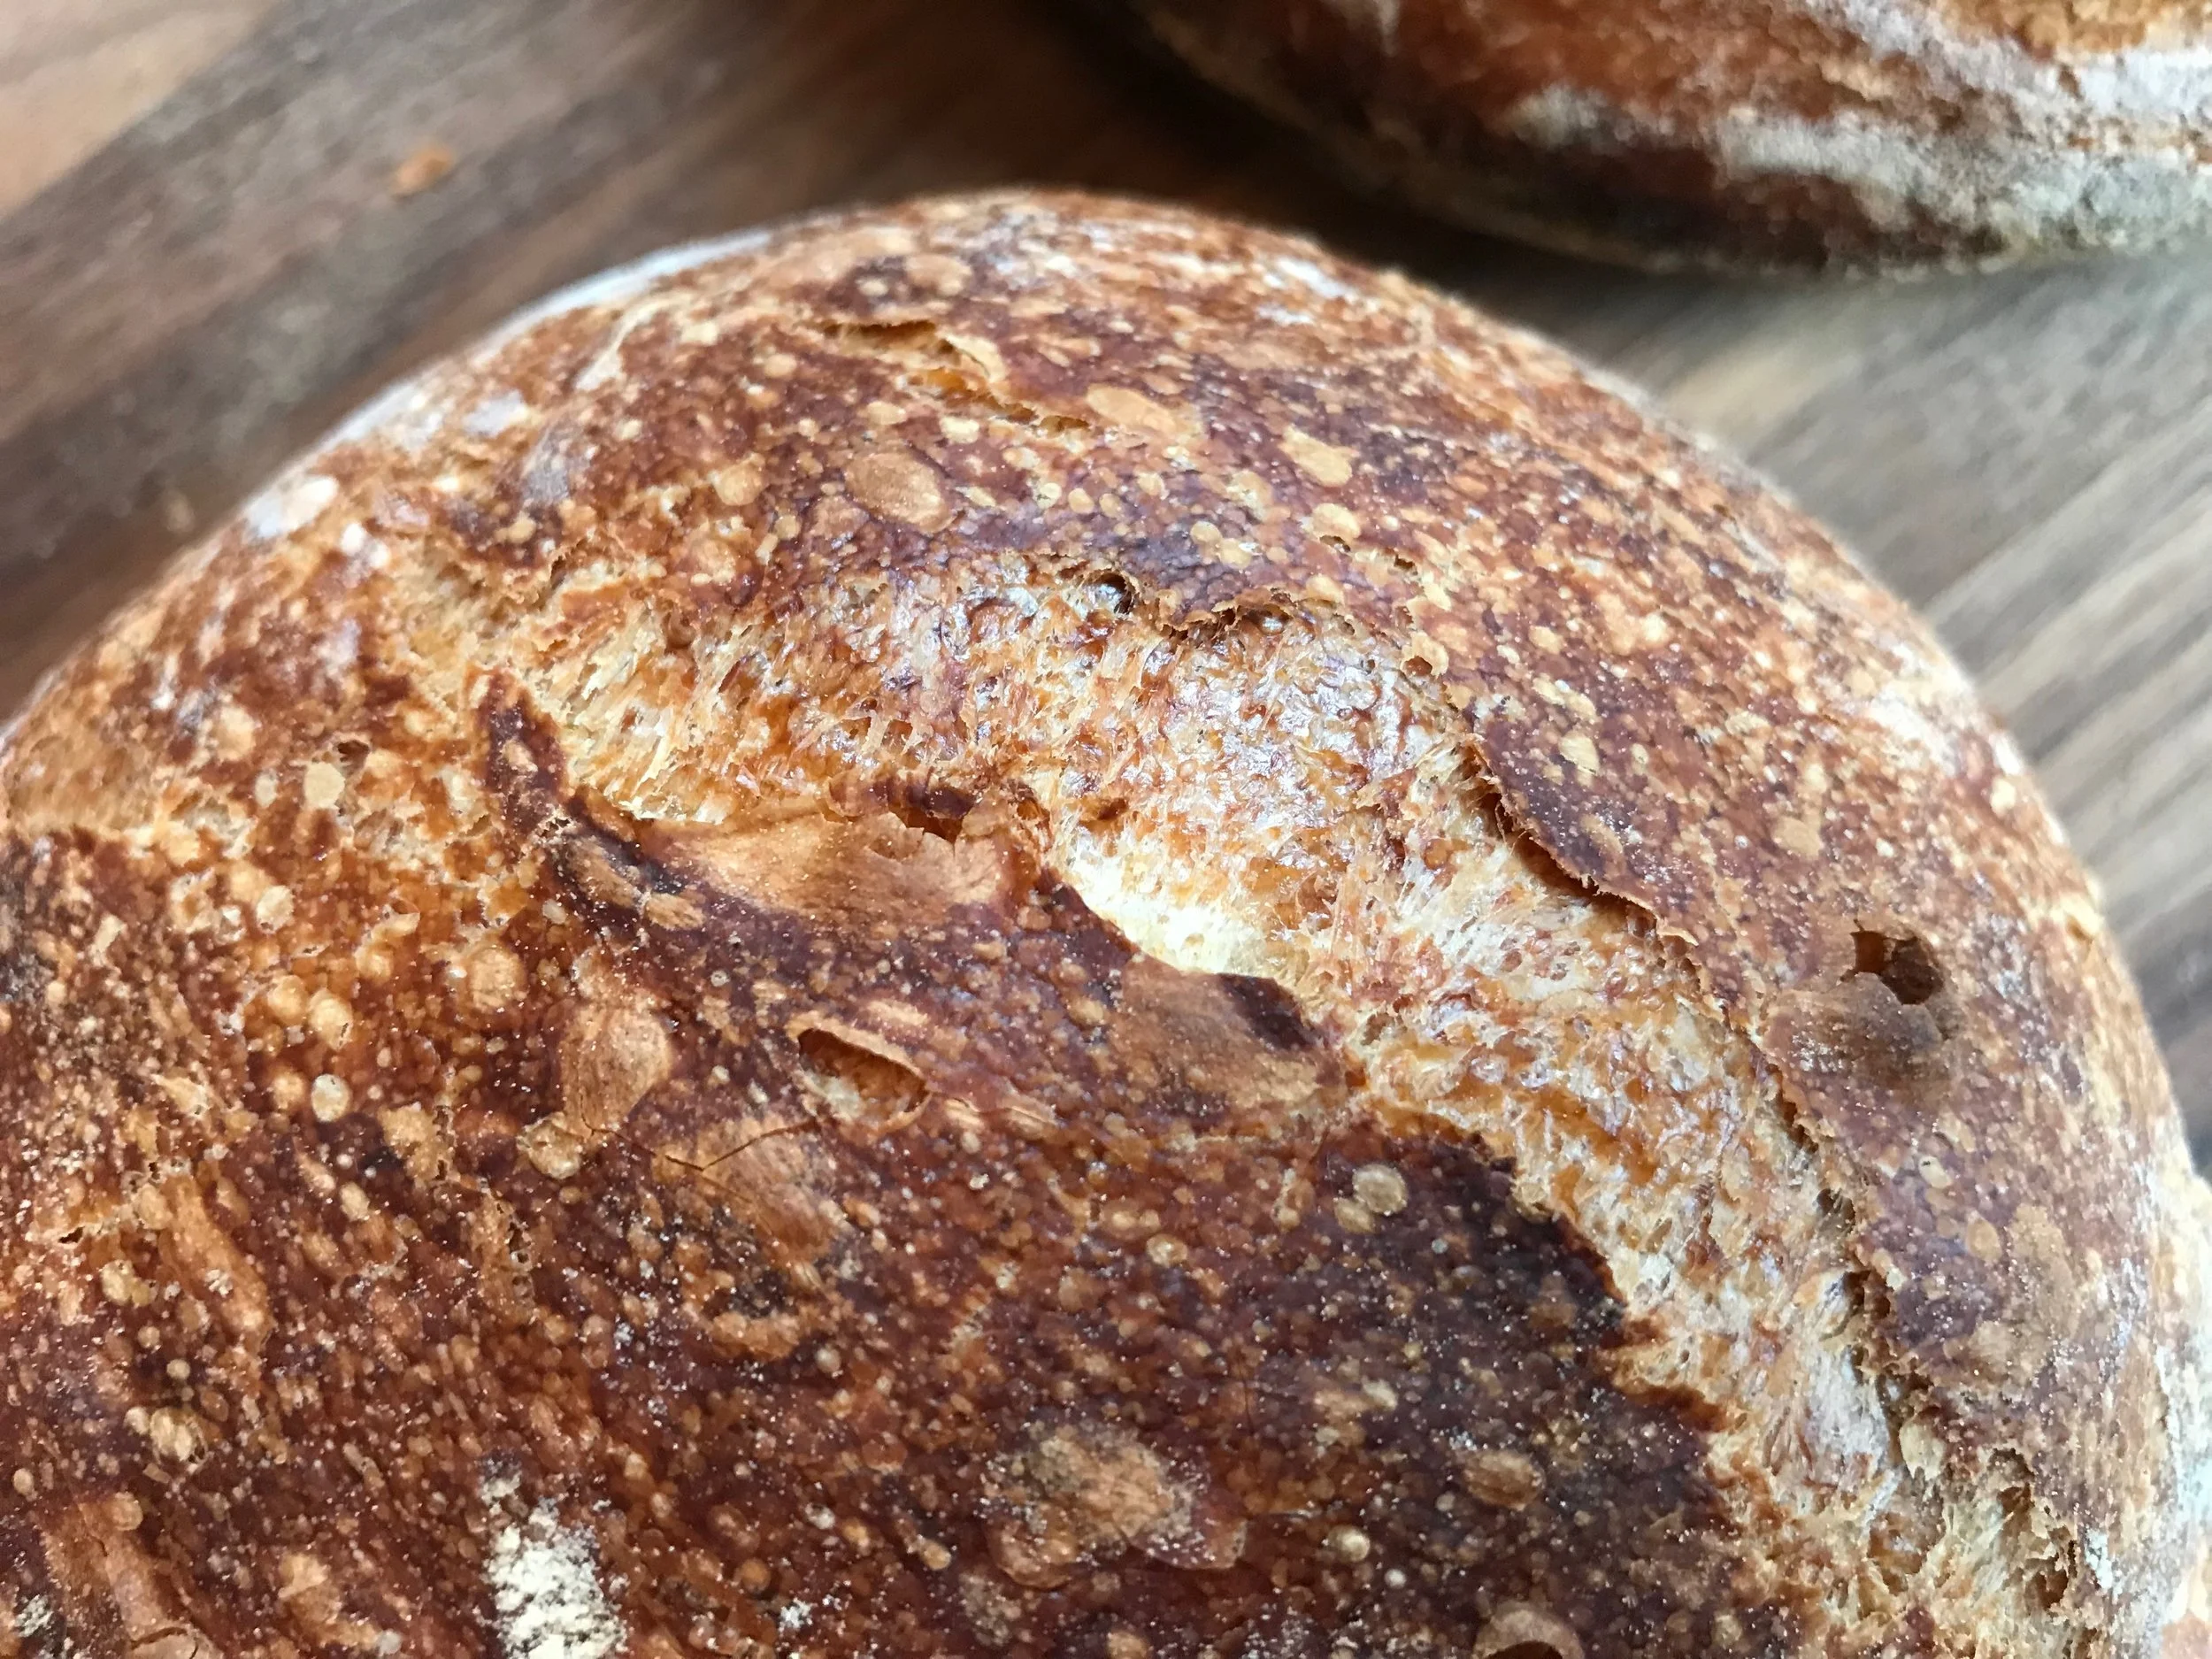
When the lid is on, the bread will rise into a nice shape. Once you remove the lid, you’re looking for a deep golden-brown, like in the pictures.
12. Remove from oven; let cool
Remove the Dutch oven. Flip it over to remove the loaf. Let loaf cool for at least 15 minutes before cutting.
13. Remove second loaf from the fridge
Let the second loaf rest at room temp, still covered with plastic wrap, for ten minutes. Meanwhile, return the empty Dutch oven to the oven to let it reheat. (It’s okay if there’s still brown flour in there—just leave it.)
14. Repeat steps 9 & 10 with second loaf
15. EAT IT.
Um, excuse me?
All-purpose flour? But I thought bread flour was best?
This formula works with a high-quality all-purpose flour, like this one, from King Arthur. I haven’t tested it with bread flour, so stick to AP.
What kind of yeast should I buy?
I like the Fleischmann’s Active Dry yeast that comes in a jar, so I can save the rest in the fridge for next time. The packet stuff works, too, though. Just make sure it’s not expired.
I have a KitchenAid—can I use it?
Yes, but this recipe works well with hands. If you’re just learning about bread, it’s nice to actually feel the dough. If you really hate getting your hands dirty, you can use your dough hook attachment to knead instead of stretching and folding in step 3.
Is my dough supposed to be this sticky?
Especially in the first few hours, yes. It’ll be extremely sticky, rugged, and ugly. It’ll get all over your hands and all over your bowl. That’s a-okay. Use warm water or a tiny bit of olive oil on your hands to make things less sticky.
This dough is not as sturdy as I expected. Is that normal?
Yes. This is a wet dough, meaning it’ll be pretty flowy and soft. The more you knead it, the sturdier it’ll become, but you don’t want it to be too sturdy—lean into the sticky, flowy, delicateness, and your bread will turn out better.
My dough isn’t rising when I rest it. What gives?
Your kitchen probably isn’t warm enough. Turn your oven on low to warm up the space and encourage the dough to rise.
How did you get those flour rings on the top of your loaf?
The loaf with no rings was made in a colander. The loaf with rings was made in a banneton, which is a proofing basket that’s naturally non-stick and produces those pretty rings. You absolutely do not need one, but if you want, here’s a link.
I’m ready to get way into bread. What books should I buy?
My favorite bread books are Tartine Bread, Flour Water Salt Yeast, The Bread Baker’s Apprentice, and the River Cottage Bread Handbook.
Got other questions? Need emergency support?
DM us on Instagram @idratherbemeryl.


